So I have wanted to make weird alien creatures and scenic creations and things of this nature, for quite a number of years now. However I can’t draw, paint pictures or design things using computers.
So for a long time I have done nothing about it, then I saw somebody on Facebook had made a little character for stop frame animation. I asked how he had done it, he told me it was armature wire and epoxy putty. This led to green stuff so there the journey began.
For anyone else who might fancy starting this making miniature aliens and weird creatures, soldiers all that kind of business. Check out… https://www.dakkadakka.com a seemingly endless font of knowledge. On browsing this site I stumbled across Dagger and brush’s blog… https://daggerandbrush.wordpress.com a very inspiring creator of sceneries and such has helped me massively also.
Eventually I’d like to help others too, maybe for now I can possibly make fellow beginers dive into the hobby and have a go, with a bit of luck my skill will grow to a point where I can guide people too.
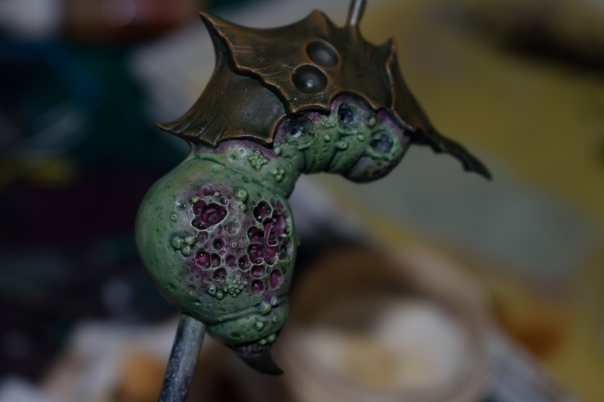
So I bought one of the start collecting sets, in the Age of Sigmar lineup that Citadel does. I chose the Daemons of Nurgle, largely because you get to paint up rotting flesh, horrible wounds and heavily weathered brass and bronze and such. I decided I’d start with one of the plague drones, following a guide on one of my favourite stores website, Elements games in the U.K.
I painted the flesh using a mixture of Citadel Nurgling green, mixed with Vallejo glaze medium and some water to keep it thin so some of the pre-shading can show through. Again something new to me.
So this got primed with an airbrush and the black primer in Vallejo’s range all over that’s probably obvious, the next stage was to airbrush using the white primer from above. First time I’ve ever tried pre-shading, I may have gone a little bit too heavy in spots.
This got the same treatment as the flesh on the body, It seemed to go ever so slightly better on the legs, perhaps I just got used to how the paint flowed with this mixture mentioned above.
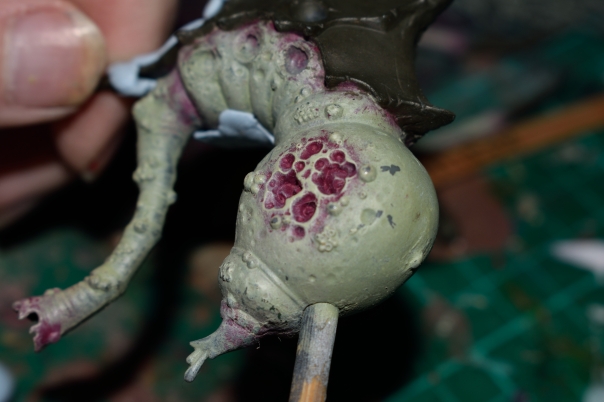
Then I had to paint the bruised/wounded parts of the flesh, using Citadel Screamer pink don’t believe the name this is so purple, infact this used to be called warlock purple. Do not ask me when or why I’m new to Citadel. This was done with my airbrush, I did make quite the mess of it and had to do some of the undercoat again. I also had to put some thinner on some tissue paper to lightly remove some of it. As this was airbrushed though some of it was quite dry it was more the pooling that was easy to remove, in one spot on the back of the body where the plating is it went down to the un-primed plastic. I tried to brush on some primer but that didn’t solve it, I am in the process of repriming it so he is covered in blu-tak and drying out.
First dry-brush done, it’s just Nurgling green with some army painter matt white mixed in, I got to test out my make-up brush bought solely for this job he can take a punch I like him.The second dry-brush just added more white, I find the army painter paints very very thick it’s a little harder to judge mixing ratios with less thick paints.
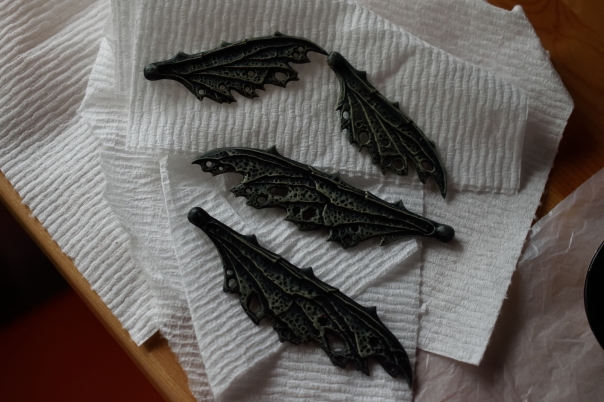
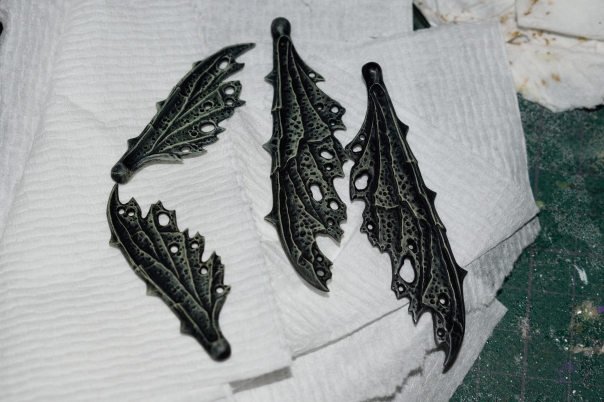
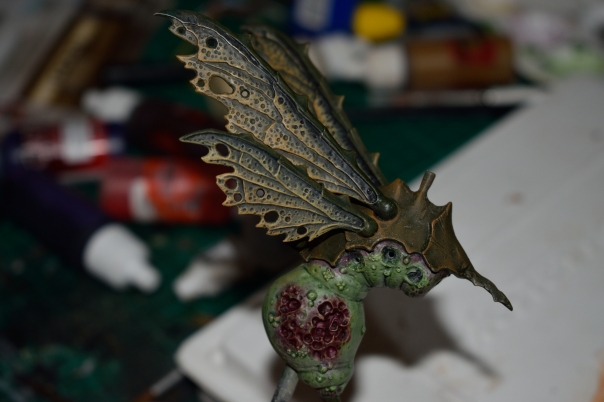
Everything needed to be dry-brushed in the same fashion, except for the boney parts of the model which hadn’t even had their undercoat yet. I did not pre-shade the wings.
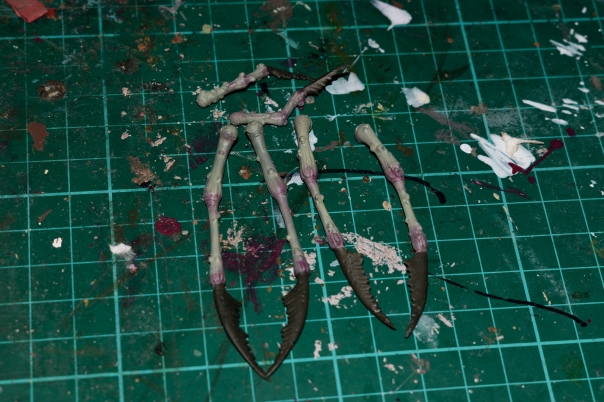
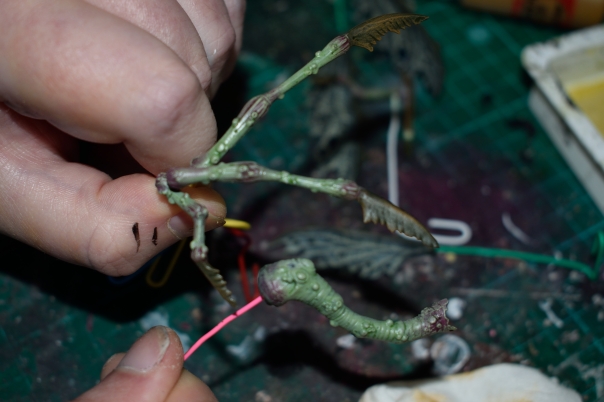
The legs with the Screamer pink on the joints, they have also had both lots of dry-brushing also the boney parts got their undercoat.
The boney undercoat is a mixture of Citadel XV-88, army painter matt black, glaze medium and some Vallejo airbrush thinner.
Body with both dry-brush coats done, also the boney bits got undercoated. You can also see the two spots I need to touch up, make that three perhaps even four some of the black primer is showing up a bit too much.From the other side, the blu-tak is to mask off where I need to re-prime on the boney bit, don’t like it.
Next once all the touch-ups are done it’s time to shade/wash things.
So many things went wrong, not least the shading/washing stage which I tried to fix but it made it worse. If you remember back to me mentioning thinner on toilet paper, and it removing more paint than I wished, sometimes it even removed some primer. I sought advice on what kind of brushes to use and went and bought a flat shader brush, it kind of tapers to a point, as long as you use the right pressure, paint consistency and amount of paint on the brush. It’s a lot harder to get it wrong, admittedly I did practice on some plasticard textured up with various pastes that I wanted to test out for a little while, so I managed to hit two birds with one stone.
I think he’s going to be sick or possibly die he’s gone a bit green.
So after a failure induced paint strip, I’ve re-done it all and got to this point. Boney bits highlighted, flesh washed.
From the other side. You may notice the drips on the sting aren’t there anymore, I seem to have pressed it against something too hard, I then cut off what remained. I may try and sculpt on my own drip.
Same deal but with the legs, head and proboscis.
So here’s the legs washed and highlighted and the head and proboscis also washed.
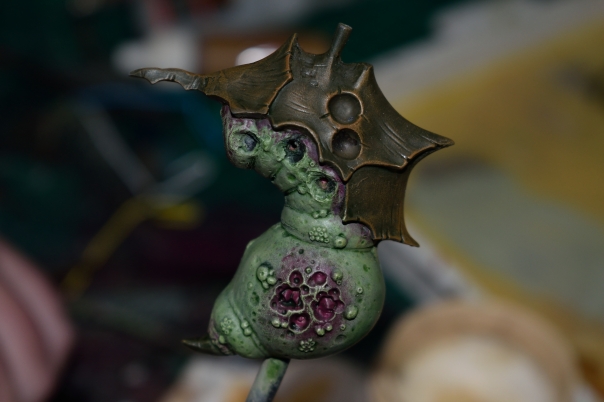
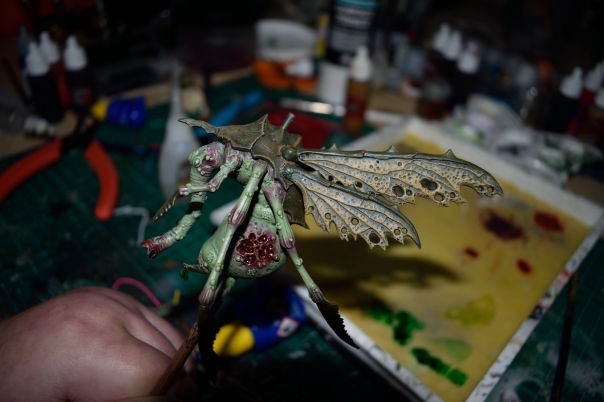
So having done the wash right this time, I did a little dance of victory, then proceeded to highlight the armoured carapace using XV-88, I just dry brushed this. With the same colour I added some glaze medium and thinner, then with my size 4 filbert I painted over the wing membranes gently. I then with some XV-88 and army painter skeleton bone mixed in dry brushed the wings, then I did a final dry brush with more skeleton bone added but I only went quite light with this. Finally I used the same wash I used on the flesh and carapace on the bony bits of the wings.
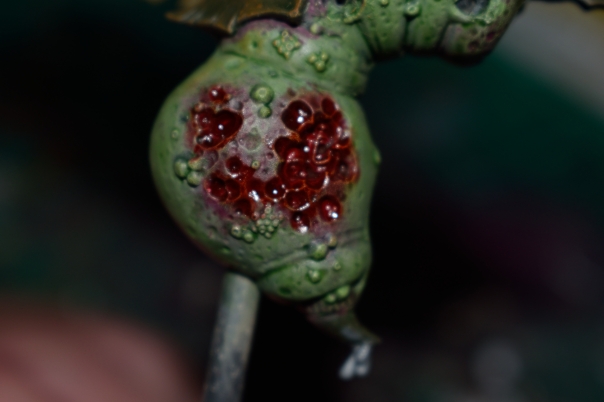
I made a purpley red wash, using a speck of Vallejo royal purple, GW rhinox hide, blood letter glaze and druchii violet. This only went on the recessed gore parts and a little bit on and in the mouth.
The scene is now set for me to make the recessed gory bits look really sore, this involved Tamiya clear red and orange with a 2:1 ratio red being the larger part, I slightly thinned it with airbrush thinner too. The mouth got a little bit of this too.
His right side all gored up, plus I stole the venom drips from one of the other plague drones sprues.Left side with the venom drips painted white.
I used Tamiya clear green on the venom drip, I was going to have the clear green be more yellow than usual by not shaking it, but it had been left to settle too long and was too yellow and I did not have much control over it. So I give it a good shake and it went back to its full green goodness.
Here he is temporarily assembled.
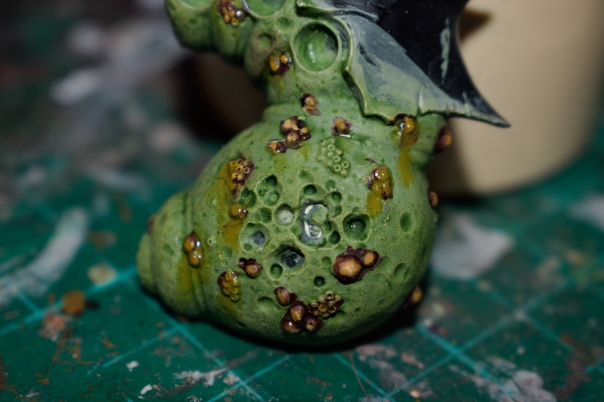
I want to do something to the spots and pustules and raised gory diseased bits but I do not know what yet. Plus his eyes have not been painted yet, I kind of want it to look really black but with a red tint to it but not sure how to go about that. Once I have fixed some slight flaws and finished off all the finer detail he will be assembled properly.
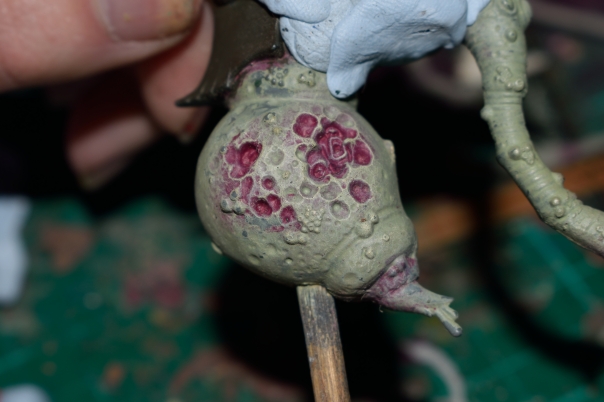
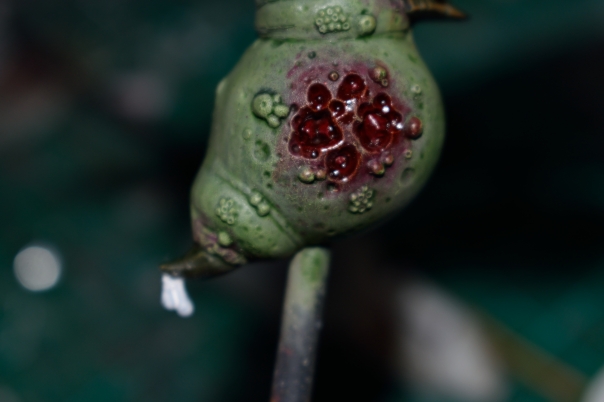
I asked around what to do with the spots, the first suggestion I got sounded good so I decided to go with that. Suggestion was basically crimson wash on the boils/spots, then paint the tops GW balor brown, then paint the tops again less of them this time with GW ungor flesh and finally a dot of GW ushabti bone. On the ones that had burst it’s a case of leave it red, I got the idea of sticking GW nurgle’s rot in the little recess of the spot and kind of paint it downwards. It seemed to ask for a 2nd coat, as it’s going on to a green colour the first coat wasn’t very present.
Eww
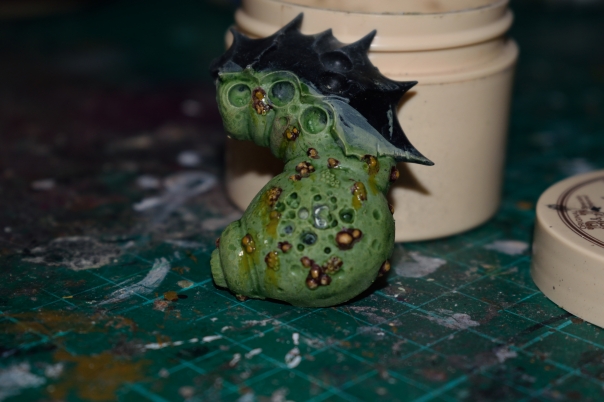
Yes this is not the same drone, I did a rushed job of priming it, basecoating, dry-brushing, washing the flesh and then the boils/spots, then did the other parts of the spots just to see how it would look. This felt better than potentially messing it up on the other one since I’ve come so far, plus I’ve paint stripped it twice that’s plenty thank you.
A closer look, I didn’t do the burst ones quite how I wanted, basically I did all the steps the other spots got, but should have only done the first then added nurgle’s rot.
So I have made some progress obviously or there would not be a part 2, I was going to show pictures in a very step by step way. But, since getting my new camera I have been spoiled and see the ipad pictures are quite rubbish. So I just used the good pictures, its going to seem like big jumps were made and it went fast but it didn’t trust me haha.
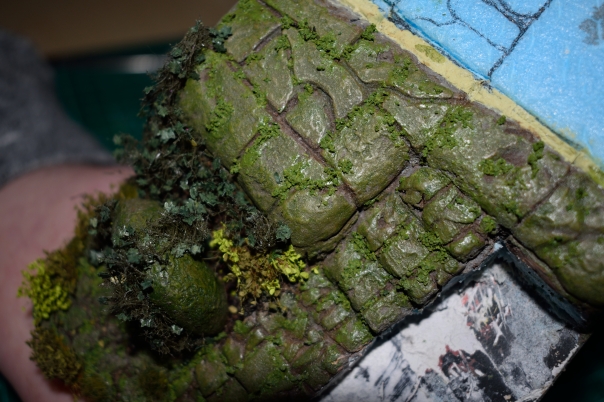
So as you can see I applied vallejo slime and grime light to the stone work, added some more stone work and dirt/soil in the form of tea.
The slime and grime effect product has made things look kind of shiny and moist, which I’m thinking and hoping it looks like in real life. I think I should have used matt varnish once I’d done the final drybrush, as at times when I thinned the slime effect some of the last drybrush coat sort of got effected too. I have just accepted that though too late to go back now, since I am very eager to finish a piece as I feel this teaches me more about how these things all merge together. What works and what doesn’t work and what is just too much of a pain to bother with, besides I still think it looks okay.
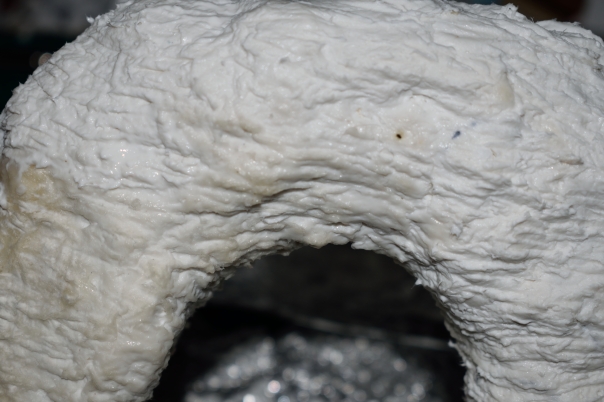
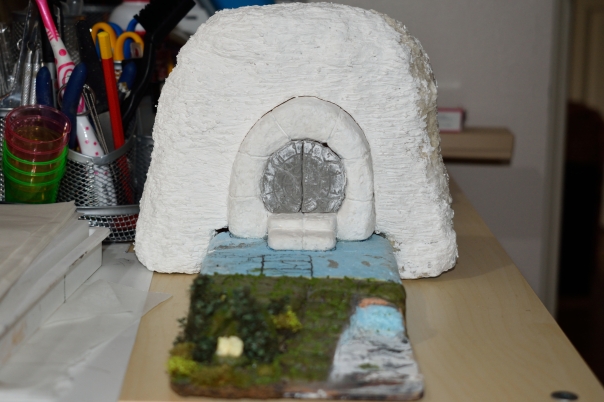
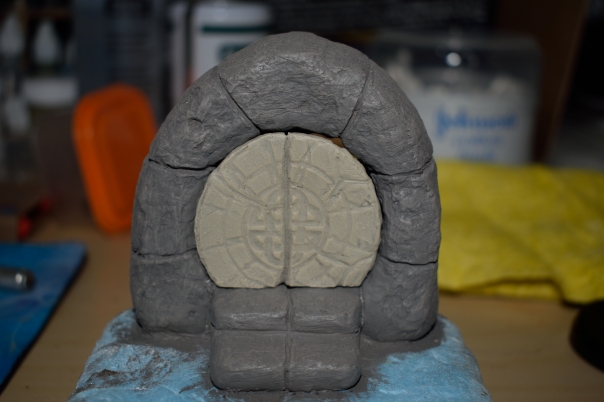
If you remember back to part 1 I had made a little door for the entrance to the mausoleum. This picture above is a rock face where the arch way for the door is built into, It’s made with eps a.k.a polystyrene found in packaging. Basically you break chunks off glue them together in a kind of random way, then soak paper towel in pva and water mix and apply over it. It will take a few layers make sure to cover over the polystyrene everywhere or it ruins the illusion easily, I didn’t paint the polystyrene so it made it harder to tell when it was exposed. If I do it this way again I will airbrush the poly.
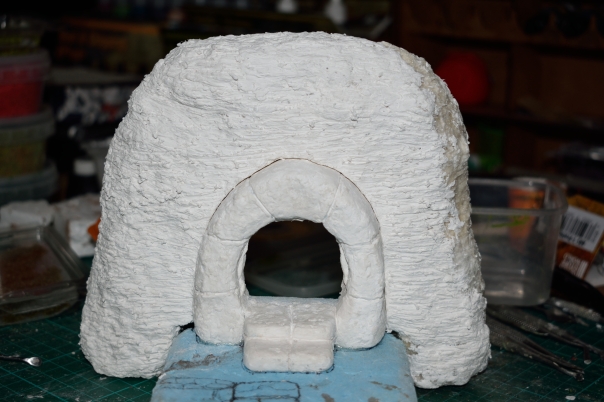
So here is the rockface with the arch way inside, I ended up adding sculptamold over the top it seemed to give me more control over sculpting in the striations in the rockface. I think because I got it wrong with the tissue and glue quite a few times and had to add more much of the texture was lost. It was much easier to just blob on sculptamold and texture it up before it fully dried, it does dry fast which can be a problem with some things but was an advantage here, I just did it in small batches which got bigger as my confidence grew.
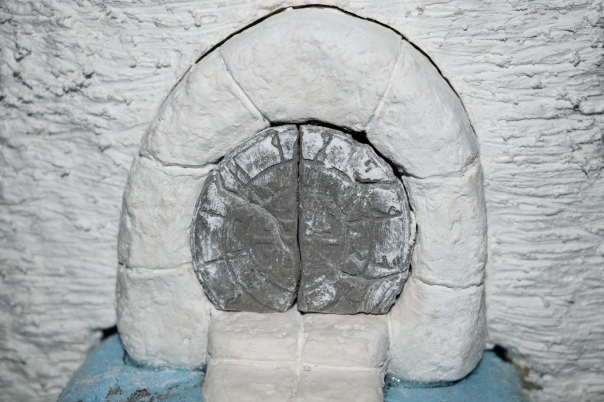
Here is the door inside the arch I’m going to mush up some air drying clay into water so I can just paint it on and it not remove all details, I hope.
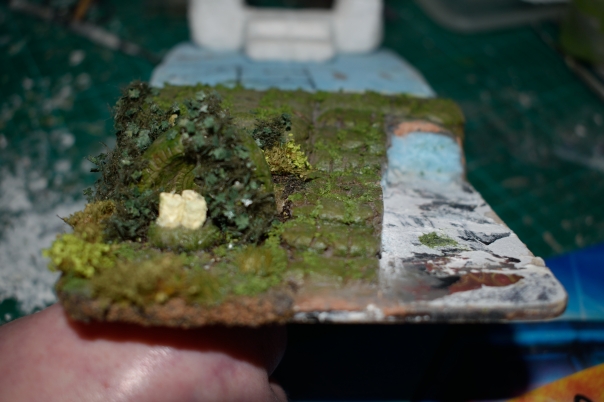
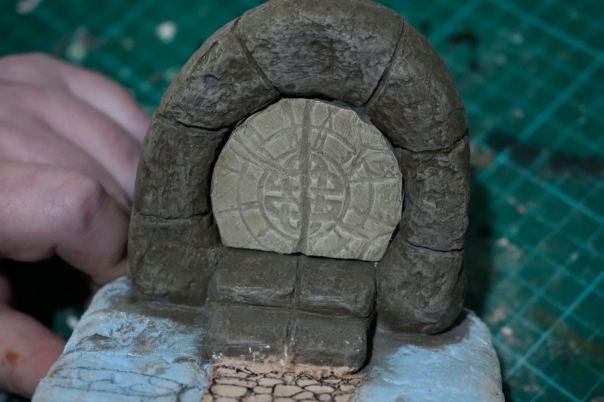
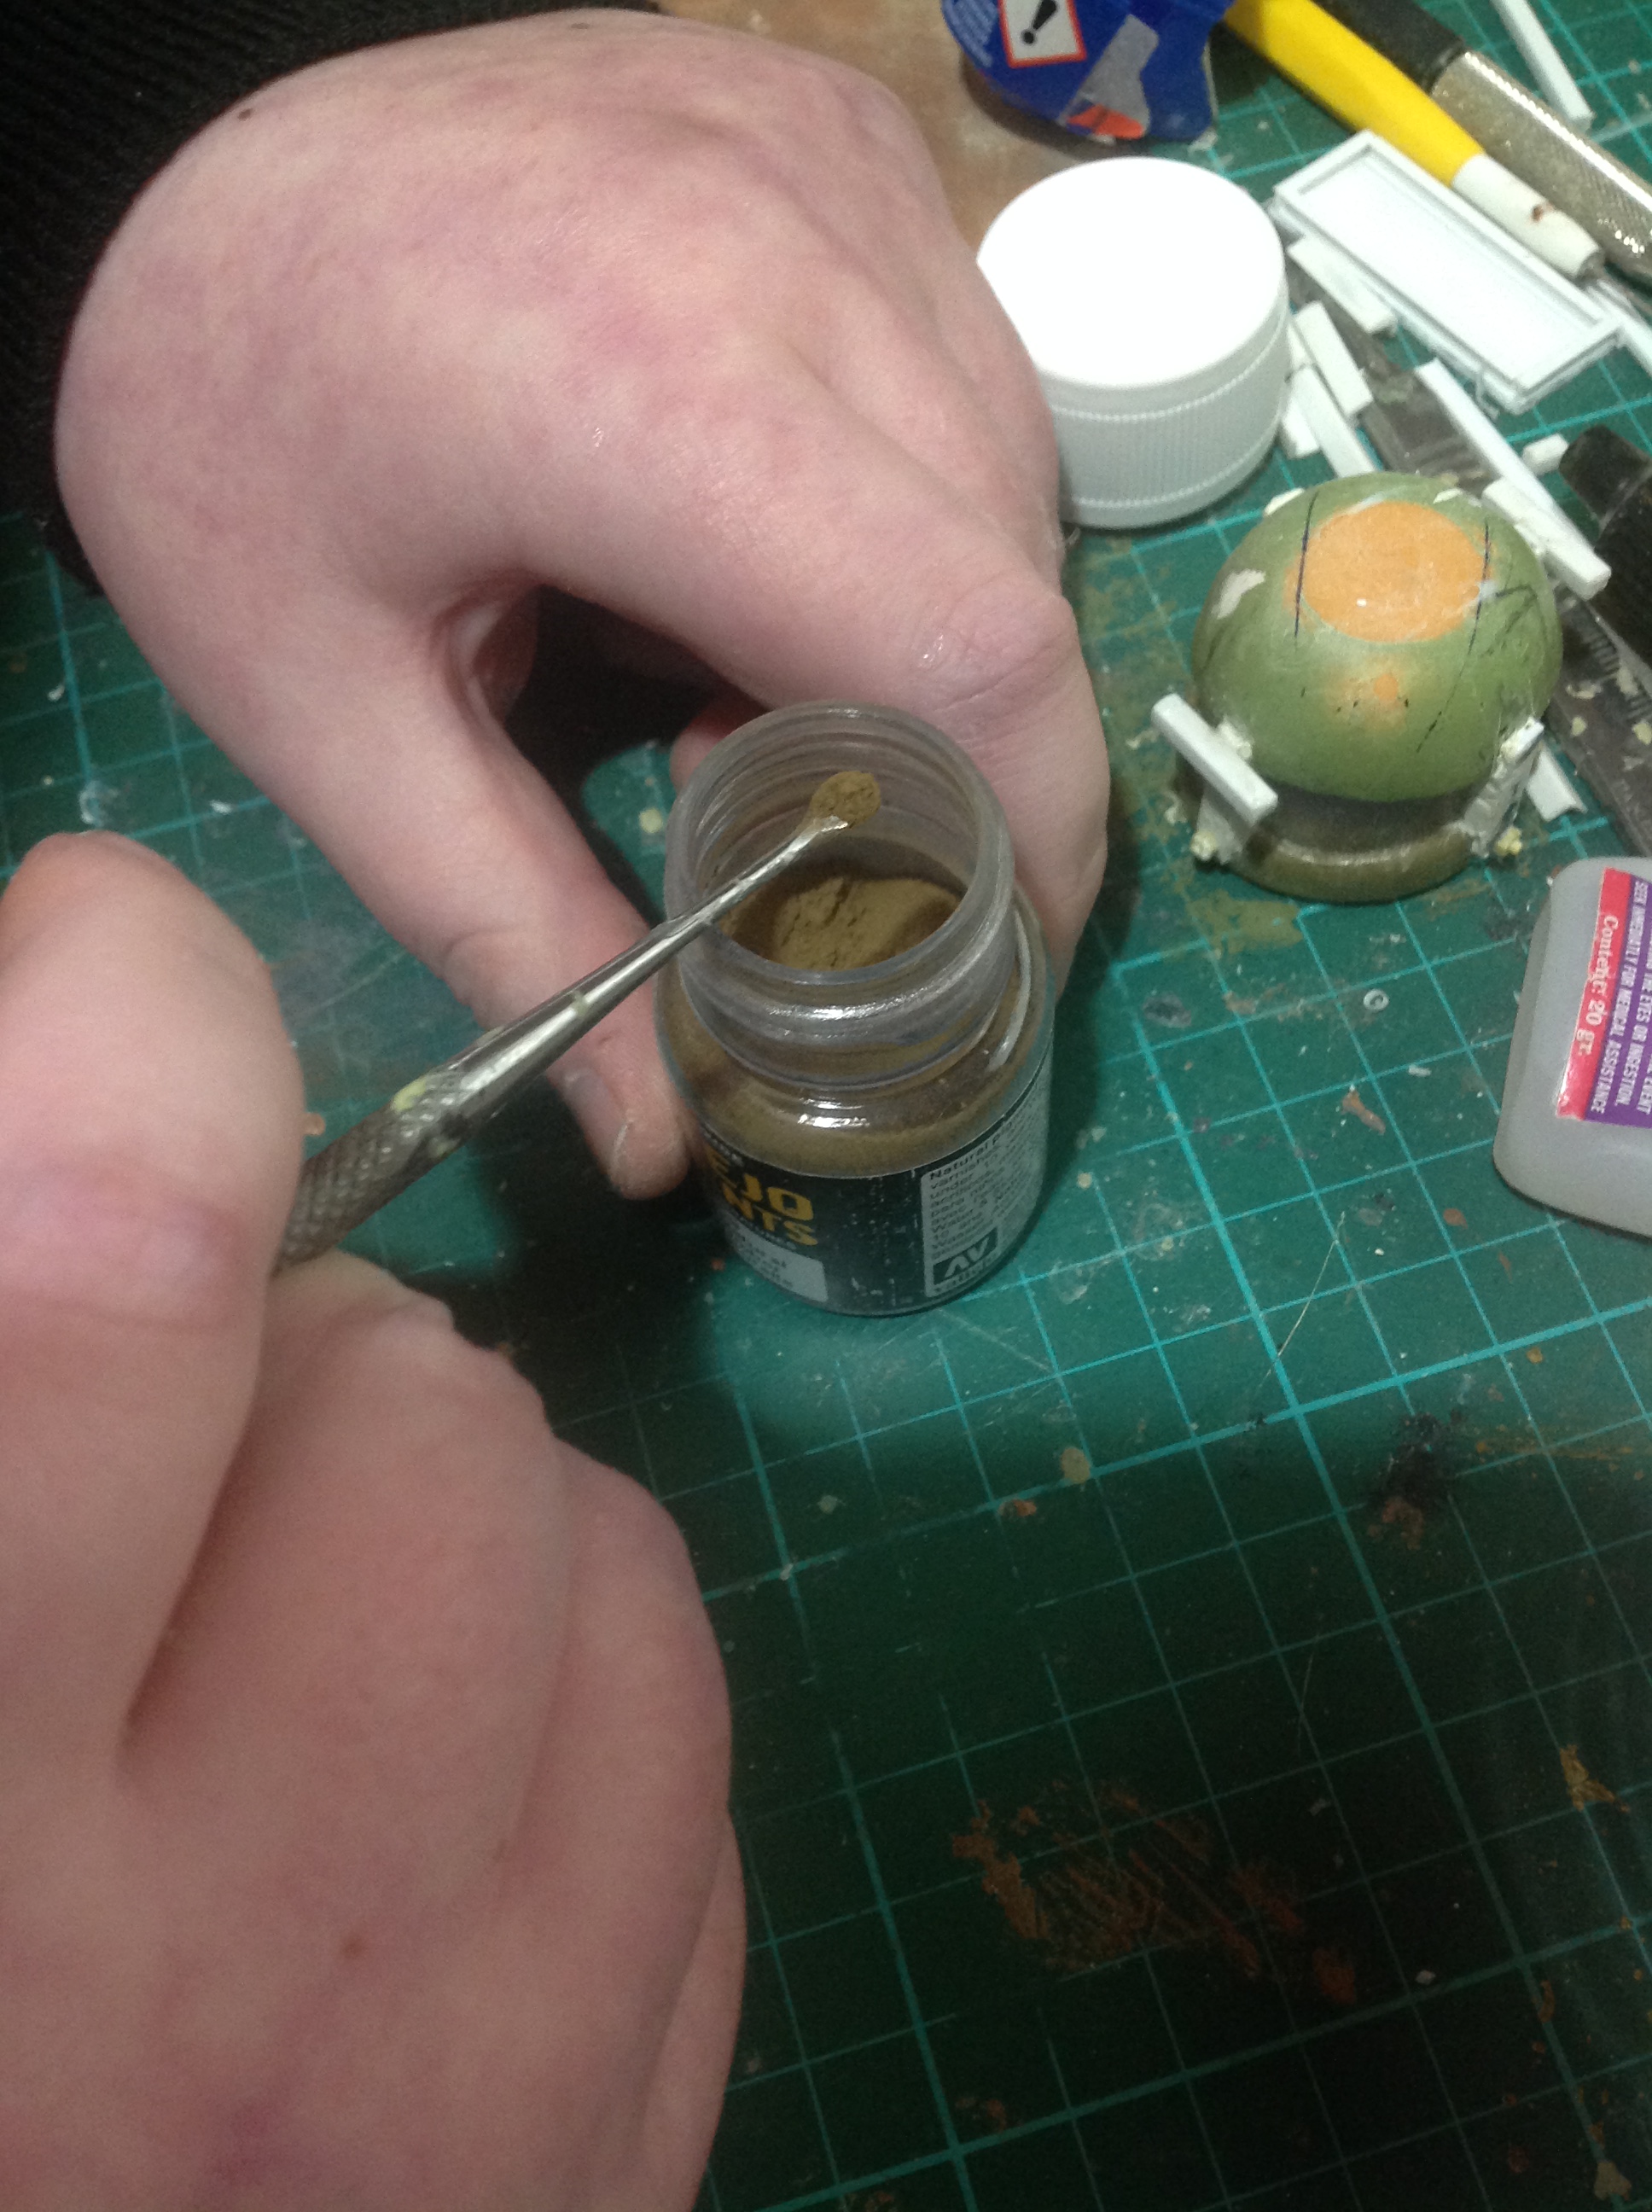
So I added some moss paste, a combination of javis fine turf I used dark green and mid green colours, few drops of olive green mixed 50/50 with beige brown or tan earth I forget which, few drops of water and wood glue. It needs to be quite sticky apply with a tooth pick too apply it then press down a little helps it to stick, and yes it can stick to your fingers at times maybe have a second tooth pick instead of fingers then you can use the other to scrape it off the pick if it’s being stubborn. I still need to apply a little more moss paste then wash it with brown then drybrush with yellow to give more shadow and light to it. Don’t put too much paint in the mix or you can end up with spots where its just paint and no moss.
Also I’ve stuck on some ivy from mininatur, there were some mistakes it’s covering I forget where the mistake was so it’s done it’s job. Fortunately it fell in a place which made it marry up with the rune covered semi-circle things application of ivy. The shrub plant things are from green stuff world, I like how the lighter plant seems to break up all the slime and grime dirt colours and dark ivy leaves. It felt a little unnatural until then and I also like the near subtle contrast between the lighter and mid-tone shrubs. I stuck about four, 4mm winter coloured tufts from a company called serious play in there too, you can not see where one of these is obviously stuck on, I will blend this in with the moss paste possibly.
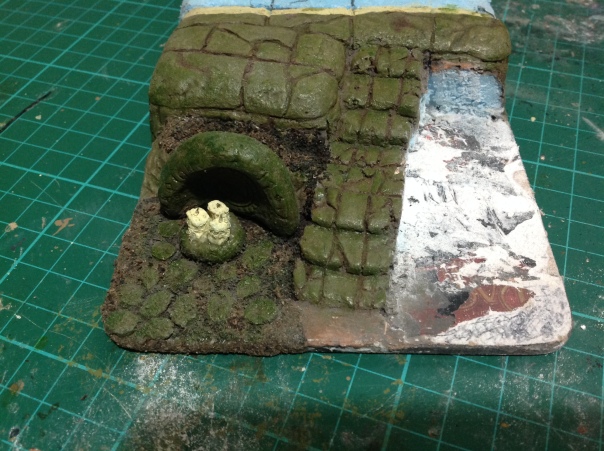
A picture of it all put together obviously provisionally for now tiny bit more covering of the rockface to go, I need to do something to the front right on the lower level.
So here is the doorway and the door together, I think captain obvious is nearby haha. The doorway has the same base coat as the other stonework in the scene. It hasn’t had its pigment wash to unify the colours, nor have I used the thinned down Vallejo smoke to give depth to the gaps e.t.c.
The door is made out of sculpey medium blend, I may have said this in part 1, for those that do not know it has a quite warm grey colour. I primed it with Vallejo IDF Israeli sand grey then base coated in IDF sand grey. Then I kept adding in more sand ivory for the dry-brushing. Again it has not had the pigment wash or smoke for depth.
The doorway looks rather roughly carved, and causes contrast in textures as well as colours to the door, as the door is very smooth apart from the symbols. Not really something I was intending to create, but it was kind of inevitable since I was making a carved rock doorway, and a door in which I wanted symbols and markings to be a feature.
So the door and doorway had the pigment wash, then I did another dry brush. I was concerned the contrast would end up being a bit too much, but once I saw the result here I was pretty pleased, I may still put some thinned smoke in the gaps between the stones, as not all of them are that brown shade you can see in some of the gaps. I am not sure about the detailing of the door, feels like if I went too dark it would not fit the lighter shade of the dry brush.
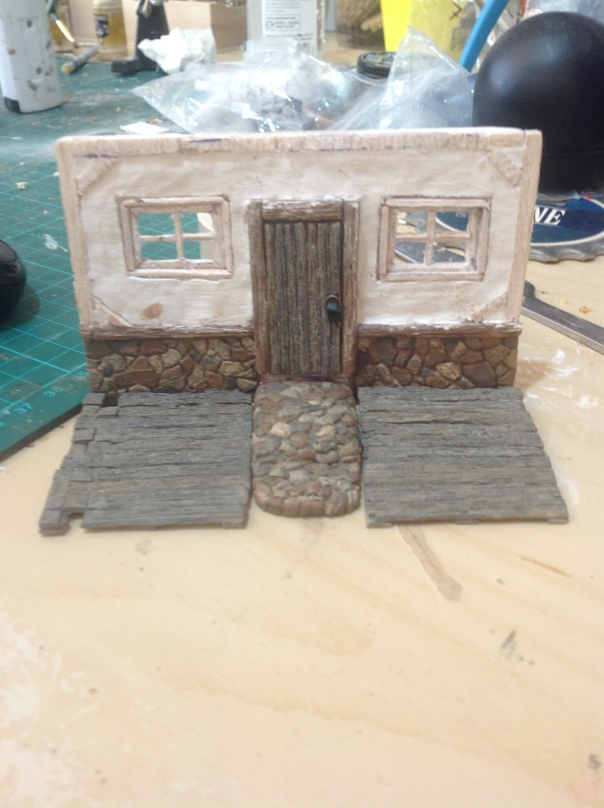
So I have started a prototype of a little house, there is much wrong with it and much more to do yet.
The windows kind of failed they’re not straight, I do like the weathering and painting of the door and decking though. They’re not suppose to be split and broken like on the left side though, I’m not happy with all of the field stones of the lower wall though paint job wasn’t the best either but, not too terrible. Oops the door handle is upside down. I’m probably going to make the whole thing wider, I’m not aiming for a mansion it just seems too small.
The main structure is foam board, the wood used is balsa textured up by wire brushes, the field stones are made from green stuff. I also rendered the wall using Das air drying clay it hasn’t cracked at all which sometimes it can, I really don’t know why it hasn’t I haven’t exactly treated it like a princess haha.
This is something that after seeing dagger and brush over at… https://daggerandbrush.wordpress.com I simply had to have a go at, this has happened before. I’ll see something he has done and I have to have a go at it, not to copy but to have a hand at things shown to me in his tutorials. I learn something each time it seems.
By now you will be thinking what the heck is he on about so to cut the shit as they say lets get some pics up!
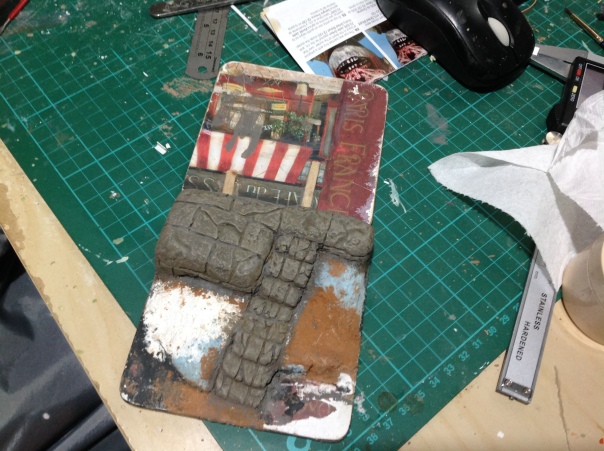
So I haven’t got very far yet, basically I roughed out a shape of the stairs I wanted to have a couple of levels. So the stairs climb once then a few of them are all one level then it climbs again, then I felt like another level using the bigger stones. As you can see I’ve used two drink coasters as the base nice and strong I can’t see them warping. I’m going to extend towards the back, not sure how far yet, I’m either going to build a cave entrance or a kind of small not sure if mausoleum is the right word. As this is supposed to be very old, I’m not sure if the kind of thing I’ve got in mind fits the time period.
As for the painting and texturing, I’ve used Ronseal multi purpose wood filler the one I used is medium colour, has a nice clay brown reddy sort of colour to it. I carved in some grooves and cracks e.t.c, the best way seems to be to gently score with the scalpel, then widen with needle tools or hooked picks that you find in dental tool sets, the set I have is labelled as wax carving tools.
Then it was mix a nice grey brown, I started with a colour that seemed to be pretty much halfway between white and black, then added in Vallejo beige brown a 60/40 split mostly grey. So base colour on I added Vallejo air colour sand (ivory) to the base colour in the wet palette, and dry brushed the whole lot. Then I added even more sand colour, and dry brushed again. In the end I think I dry brushed 4 times getting lighter each turn, already this brings out the texture and highlights and shadows as far as the base coat.
Things at this point can still seem a bit shiney and plastic, but don’t worry about this we will fix this later. The next part will address this somewhat, this involves a sprinkle of pigment (Vallejo natural umber), a couple of drops of water or as in my case two drops of Vallejo airbrush thinner and one drop of matt varnish. I decanted my airbrush thinner into a eyedropper Vallejo style bottle, on first attempt I found it to be a bit too full on this may have worked well for something really muddy but that wasn’t what I was after. Next attempt I put a bit less pigment in and an extra drop of thinner.
This was a sprinkle just to be less vague with what sprinkle means, this is in my humble opinion. But I’m sure other people may use more or even less.
I made a few batches of this wash, you may be better doing it enough quantity to cover your whole pieces/area in one go for better consistency. Maybe try a test batch on something it doesn’t matter if it goes all wrong, I found at first it looks all glossy like you put too much on. I was tempted to wipe it all off, but I let it all dry out to make sure, I had mostly got it right and only had to strip and restart one of the items. I gave them a very gentle drybrush very similar shade to fourth drybrush I did maybe a touch darker. Much of the shiny plastic look had now gone, I think I am going to use Vallejo smoke to darken the gaps between the stones and the cracks etc. Smoke is one of the transparent paints they do, however unthinned it is very strong and near opaque, but it also has a grittyness to it. Unthinned it may be great to build up for a rust texture and with the kind of dirty brown it would really fit into a rust colour scheme.
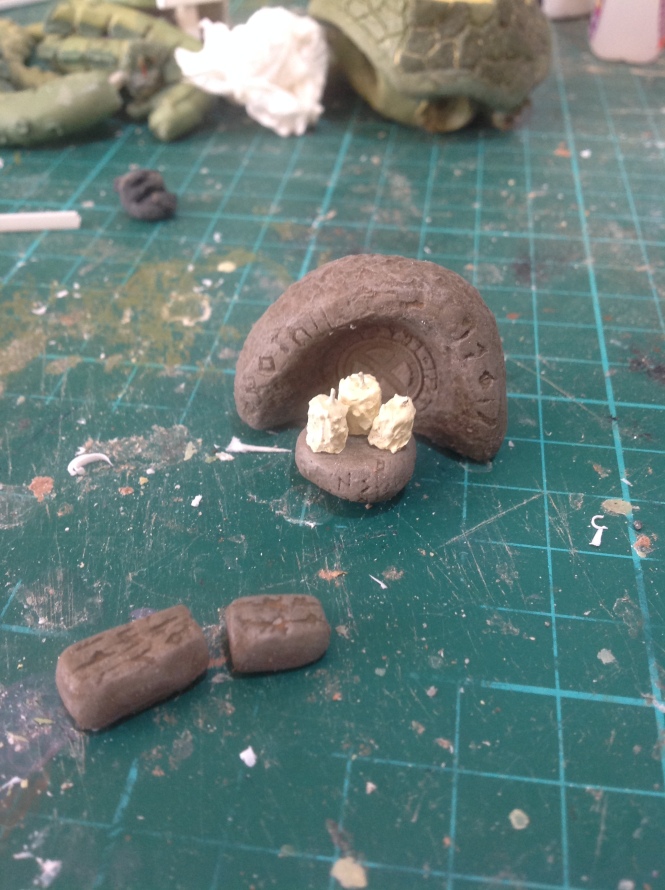
These were painted the same way as the stairs and higher level large stones, however since no wood filler was used and they have a much more smooth shape. Dry brushing is not quite as effective, I avoided the wood filler because I wanted the runes to be quite sharp and prominent. For the two sections of the broken pillar type thing, I mixed up some standard milliput and made a sort of solid thing to shape green stuff on top of. For the simple reason milliput is far cheaper and sets like rock so no flex at all, the other two pieces were made from blue foam and green stuff on top.
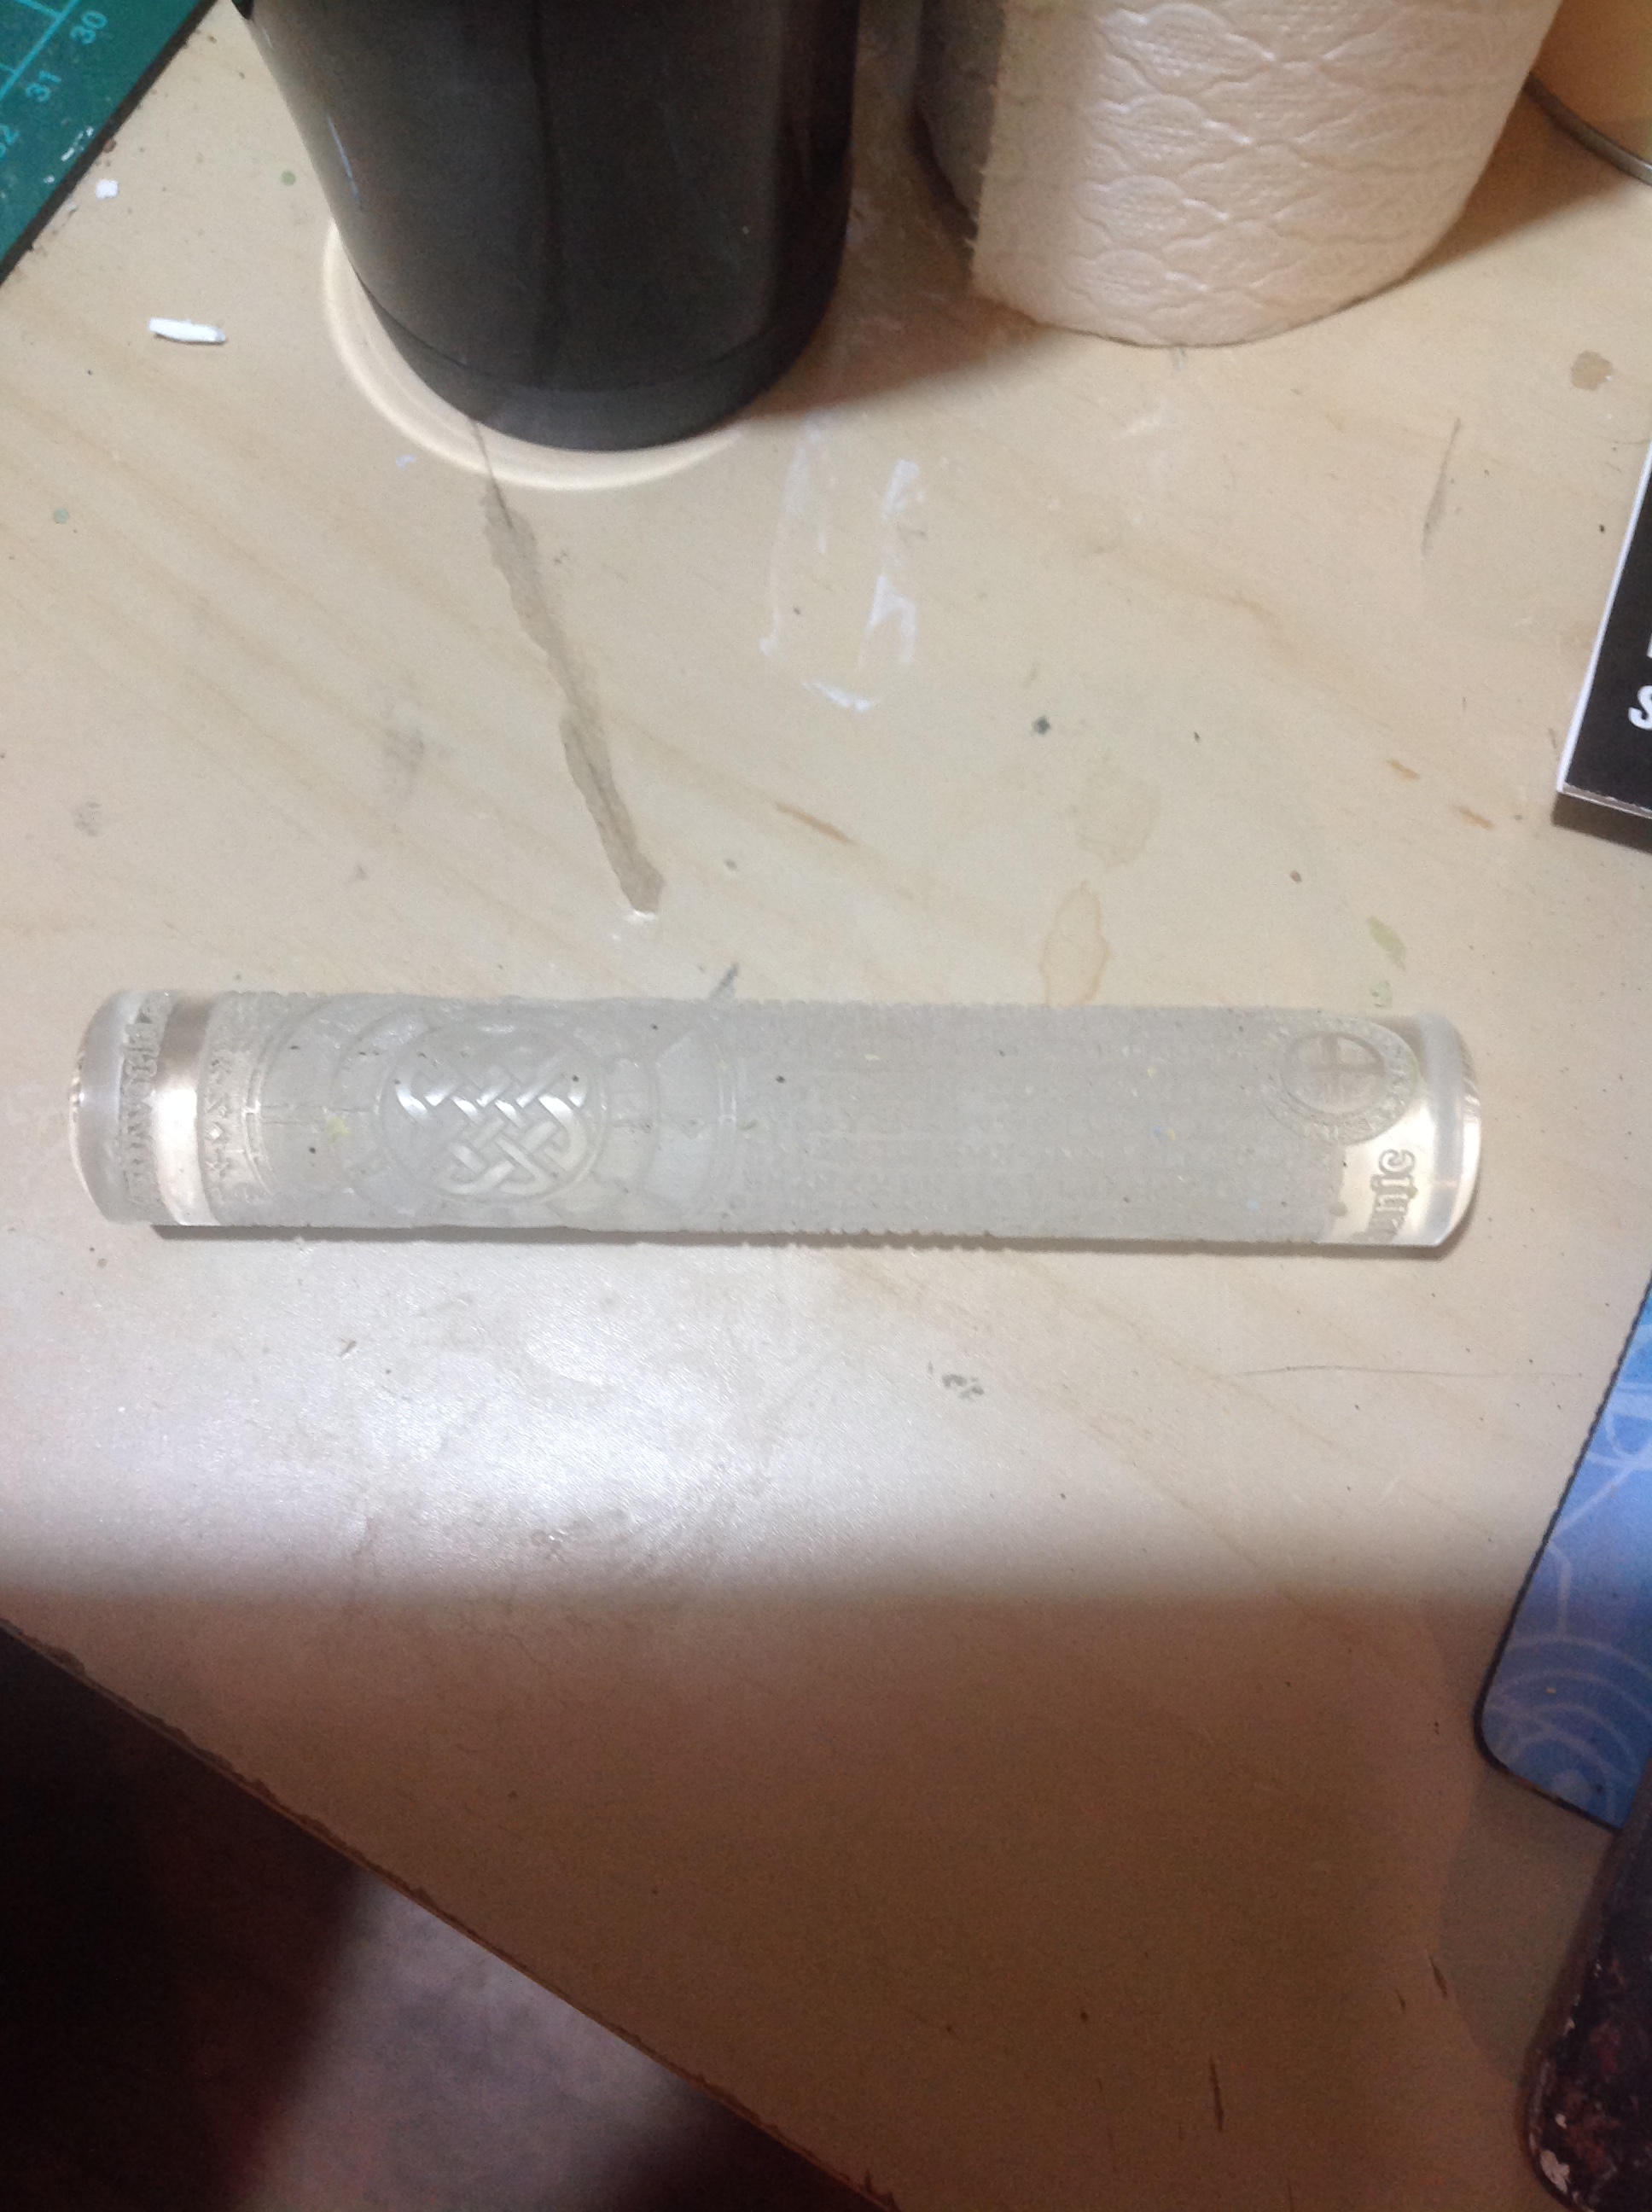
This is the textured rolling pin I bought from green stuff world, this is the ‘runic’ one.
I found for the markings and patterns on the larger thing, were easier to deal with if after pressing them into the green stuff let them harden a bit before removing from the rolling pin. Prevents them from getting warped or having fingerprints pressed into them, I then covered over the blue foam covered the gaps. I also heavily stipled on liquid green stuff, but only on the larger item. Gives more texture for the dry brushing to be more effective, I was more fussy with this item as it will all be visible well mostly. The other 3 a large part of them will just blend into the other terrain, I will still use Vallejo slimy grime light weathering effect to depict light moss growth, I’ve never done this before so I will test it on something first. Also I will make a moss paste see dagger and brushes site again for tips on that… https://daggerandbrush.wordpress.com/2014/04/16/crypt-of-the-damned-a-soul-shattering-tutorial-part-ii/ I’m not sure where exactly this piece will go after I have done the moss paste, light moss growth and using the smoke in the cracks and gaps in the stones, I guess I can make a part two to show progress when I make it.
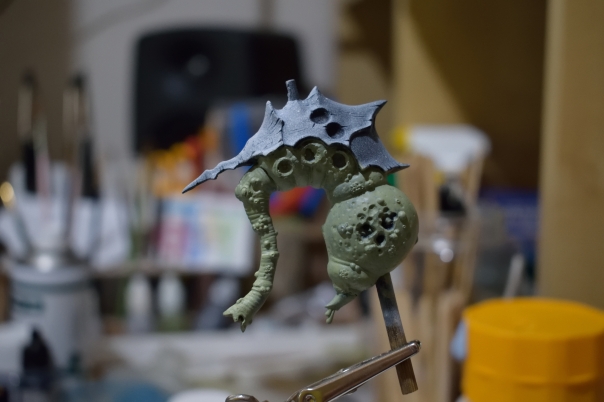
This is not some sort of weird Hentai porn creature, if you’re looking for that google further. What it is though is, an alien creature which i began making as a fifth birthday present for my nephew, who is already 5 and it’s still not finished deadline reached and breached.
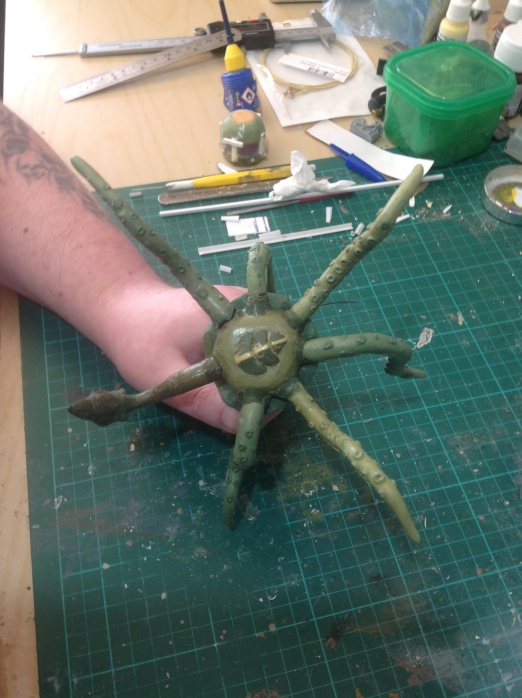
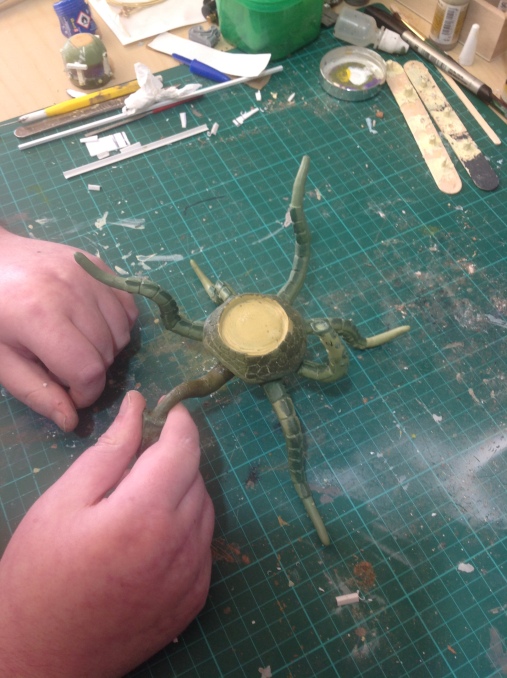
As you will see in the below picture and have guessed from the title, it’s a bit of a weird hybrid creature. It began with eight tentacles, then I decided to add a turtle like head so two legs had to go. Oh I forgot the under carriage is crab inspired too, but, that is very undeveloped need the legs fully finished and in place first to see where it will all go.
There you can see the beginnings of the kind of crab like armour, plus the suckers on the tentacles.
There you can see how he stands, you can’t see his head my finger and thumb have eaten him. The yellow circle on his back is where the brain in the jar sits, the brain has hijacked this killing machine cause he ain’t got nobody budumm tish, sorry about that crap joke haha.
Here is a sort of better view of the head, I am going to shorten the neck however his head wont point down as much either.
There is the brain in place, there will be a missile launcher in place when i have mocked up a little frame to make it look right. It looked a bit stupid just being stuck on the top there, it wonderfully adds to the steam punky vibe I’m going for. Im not going full on gears and cogs all over the shop, no boilers and such. There is going to be aged brass paint jobs going on though, at least as far as the brain tub and some of the missile launcher. Not sure if steel was used much in the steam era though, I’m not trying to be all one hundred percent historically accurate however. If I get the brass paint job to be really good I’m pleased with that.
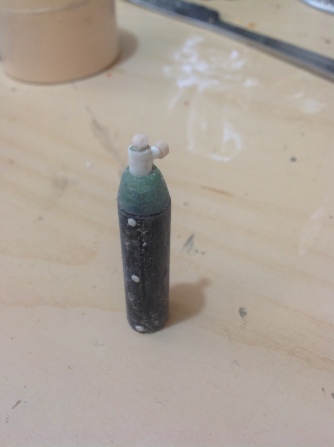
There is a gas tank I scratch built, the black part is from the roll of poo bags that we take out for the dogs adventures outside. You’ve guessed it that’s green stuff, which I bought from the same place as the plasticard tubes. The hex bolts are from a black rubber mold from the same place as the green stuff also… http://www.greenstuffworld.com/en/ link there for you. The rivets on the side are from the RP Toolz 0.5 – 2mm punch and dye set, I wanted them flush so the rubber mold wasn’t very good here, there’s just enough height for something to weather up and give texture if that’s the right word. I may trim some of the height off this, originally this was going to be the creatures oxygen supply, but a gas mask type of thing didn’t seem it would fit in somehow. May use it as fluids/sustenance to keep the brain alive, I’ll show you when I decide and build it.
As always feedback is welcomed as are questions and anything you might want to tell me about your own projects. Maybe because it’s in a similar vein to this or just because you can.
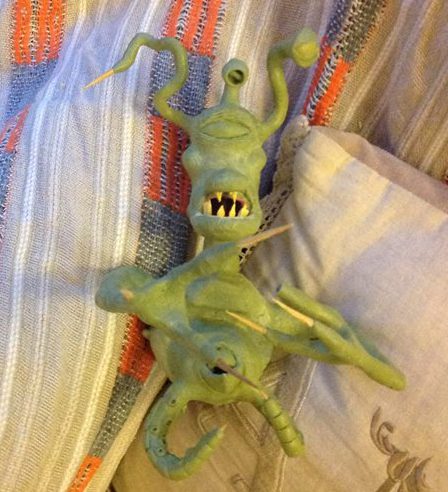
I started with a very large miniature, so more like a massiveiature hahaha. There are no progress shots it’s just a how far i’ve got.
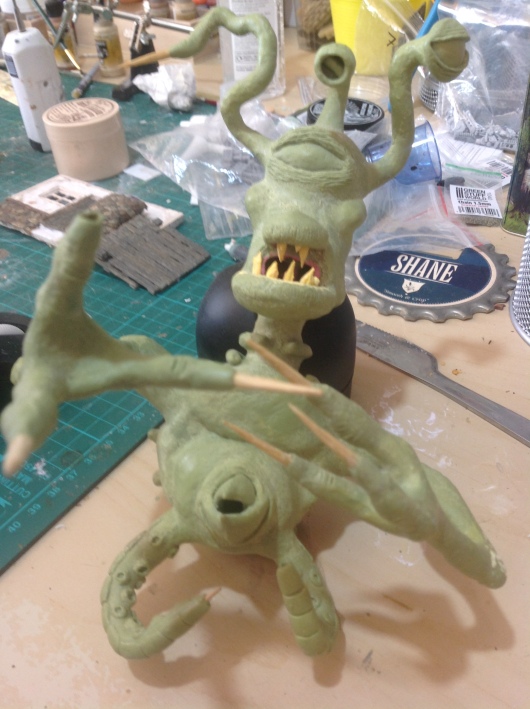
So yeah as you can see it is not a miniature, stands at about 21cm still haven’t decided what to do with his lower body, whether that ends up being legs or tank wheels or whatever I still have not decided. I made some legs and the kind of body like a wasps, the proportions seemed to be off somehow, legs too thin.
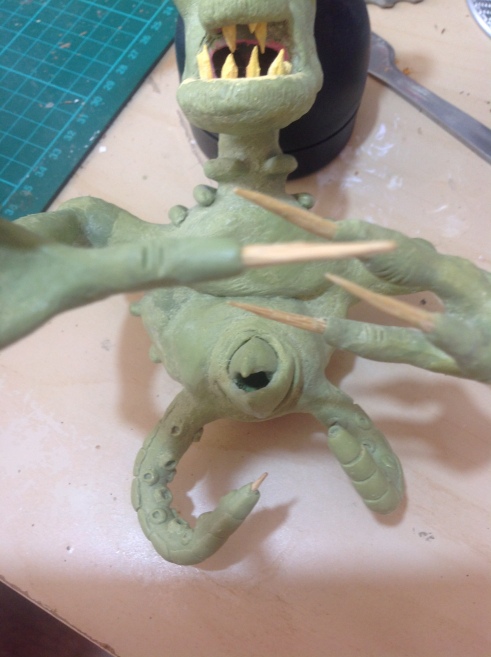
A side view here obviously, you can see his ribs/boney armour on his back and side. The side of the protruding eye on the back of his head. At first he had slits above the mouth for the nose, then I built it like an elephants I suppose on the top of his head. Which brings me to the other two appendages on his head, so you can’t really see the one with the barb on the end, I haven’t decided if this is a weapon or a reproductive organ. The eye on the stalk I guess it’s obvious what that is, kind of looks like an organic version of the ones on the war of the worlds thingies.
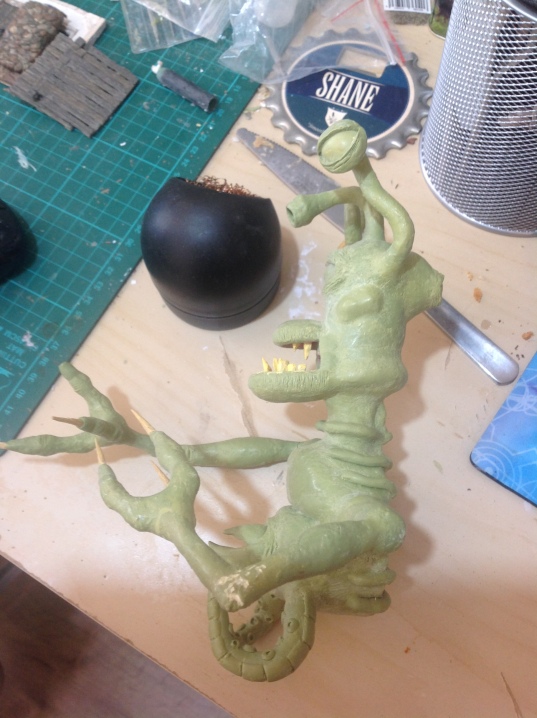
A better view of his boney armour on his back, also you can now see the barb I was talking about. His right arm suffered an injury when gravity on the floor conspired against him.
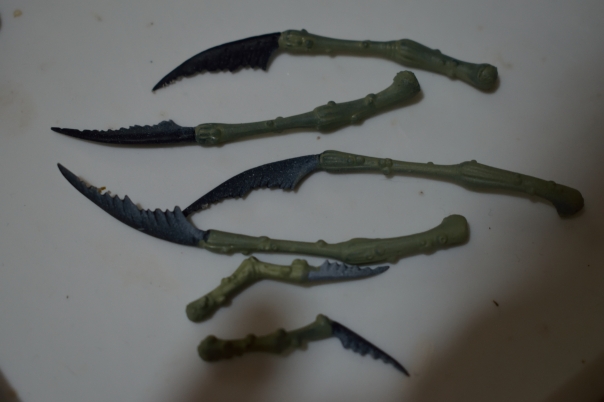
Finally a view of his british teeth haha. You can see his claws also his second mouth, I kind of copied/ was inspired by an octopus beak. Also some armoured tentacles, with like poisoned spikes on the end the idea being this is kind of how he eats or maybe it’s just a weapon.
So this is as far as I have got, if you have any questions or feedback don’t be shy, also I’d like to see any work you have to share also.